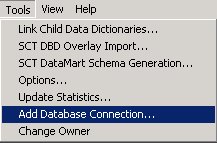
On the Tools menu in the CONNX Data Dictionary Manager window, click Add Database Connection.
The Enter the logical name of the new database: dialog box appears. Enter the new name of the database from which you will be importing files. Select a database type (either RMS, C-ISAM, or VSAM) from the list box. Enter the server name, and then click the OK button.
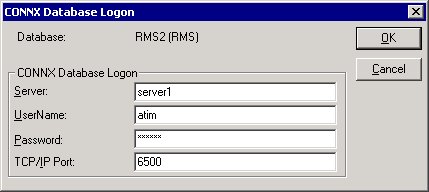
The CONNX Database Logon dialog box appears. Log on to your system database by entering the server name, a user name and password, and the TCP/IP port. (If you are using Pathworks, the TCP/IP port text box does not appear.)
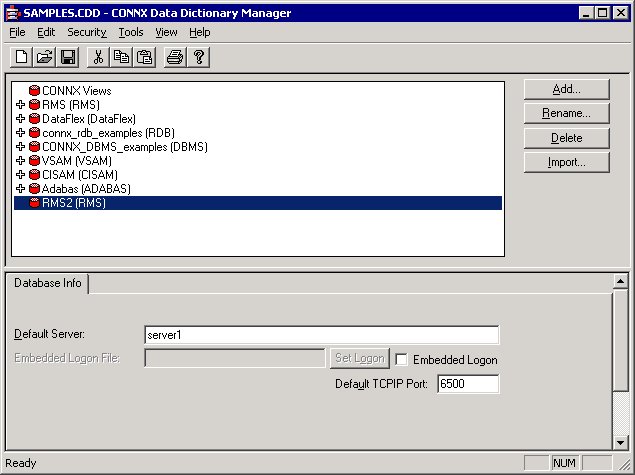
The new database container appears in the upper pane of the CONNX Data Dictionary Manager window.
To import files into the new database, click the Import button. The Import CDD dialog box appears. Enter the appropriate information for your database type. See the section on RMS imports ("CONNX for DataFlex, RMS, and DBMS Databases") for more information. Select the desired destination database from the Destination Database list box.
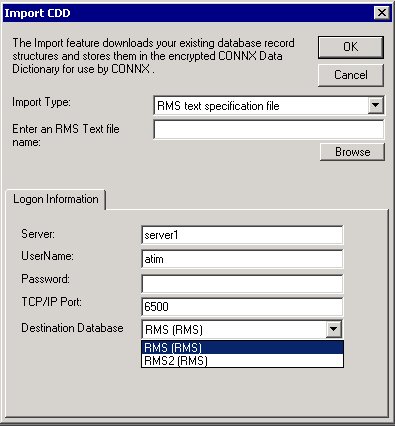
The file will be added to the new container in the CONNX Data Dictionary Manager window. Note that this example was created using the RMS text specification file import option. Imports using the other import options are performed in the same manner.